I've done cherry blossoms on a jade colored background before but it was always just too busy for me so I saw this somewhere and decided to recreate it. This is my first tutorial so bear with me!
Supplies I used:
WOW- That came out tiny! Okay, lesson learned. I spent all that time typing it out on the picture and it's unreadable. Hah! From top left, to right; 100% Acetone, Sinful Colors Black on Black, Wet-n-wild I need a refresh-mint, Wet-n-wild Tropicalia, Spoiled Colors Correction Tape, Sinful Colors Pinky Glitter. On the bottom I have my combo dotting tool and nail art brush, and then my beloved ELF foundation brush which I use for cleanup. I also use a pad of artists paper. You'll see why. You're going to need a cleanup brush for this one!
First, let me point out a few things. For nail art, I DO NOT use expensive polishes. I think it is wasteful.
Second, my camera died mid-painting so I'll have to describe the last few steps to you as I did them.
*First, I put on a coat of basecoat (I use Essie's all-in-one) then a thin coat of Pinky Glitter. This adds a bit of sparkle but not much else. It's nice.
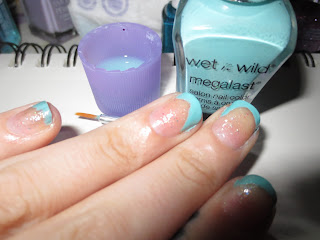
*Put a BIG dab of your jade or mint green on the paper and use your art brush to paint the tips. You don't want this perfect and straight. Go up the sides and curve downwards, alternate sides, etc. You'll do two thin coats of this and let it dry 5 minutes or so.
Keep your brush clean and thin your dollop of green polish with acetone if it gets too thick; much like painting with acrylic paints.
Here's where my camera dies...
I then put some black polish on the paper and used a fine striping brush (I saved one from an old bottle of art polish) to add branches. To do this, you don't want straight lines. Make them wiggly! I like to put my branches near the line where you painted the green and then one coming from the top or side. Whatever you want, loves.
After you've made your branches, get out your white, pink and red colors and dotting tool. It's not pictured, but I used Essie's muchi muchi for my light pink. Put one large drop of each on the paper, right next to each other and swirl it together like this:
I always add more white than anything. Swirl around the paint a bit with your dotting tool, making sure you get a nice light color and make 4-petal dot flowers on the branches. I don't do more than two per nail. You'll also put single dots along the branches for smaller flowers and you can do 3-dotted flowers as well. Again, however you like it!
When you're done with all of the flowers you'll go back with your pink or red and dot the middle of the flowers.
You've just made Jade and Cherry Blossom nails! These are easy because you don't have to have a steady hand (branches are wiggly!) and you don't have to have really special tools. It's a good starter if you don't do nail art often like me. If you do this, send your pictures to my facebook page. I'd love to see how wonderful ya'll are!
Until next time,
Carrie


Nice mani, Carrie! Love the cherry blossoms and I like how you mixed the colors for the blossoms. I love it when nail art looks like real art! The sheer glitter is a lovely background too.
ReplyDeleteThank you Anna! It was my first attempt ever at doing nail art. I hope I can become much better in the short future :)
Delete